
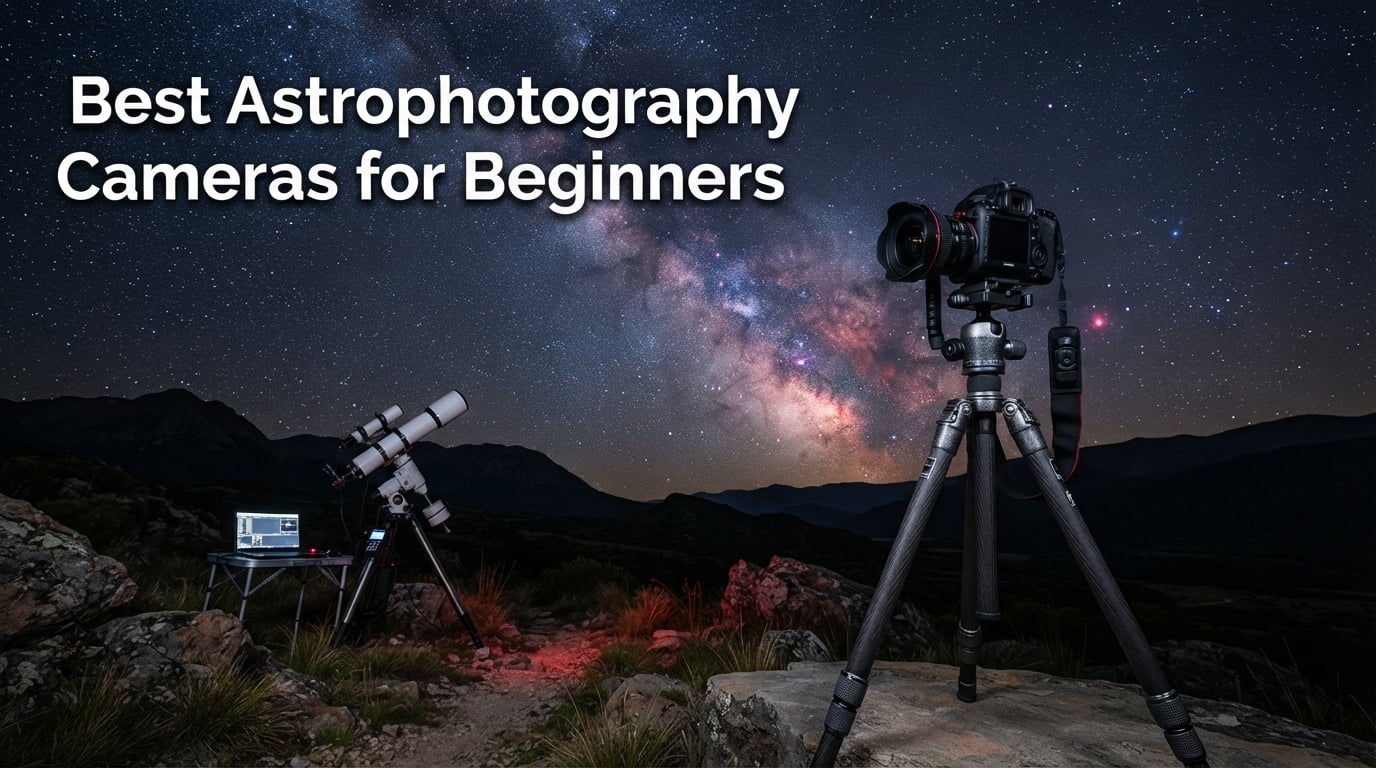
I still remember my first night trying to photograph the Orion Nebula with a borrowed point-and-shoot camera. The results were a blurry orange smudge that looked nothing like the images I had seen online. That failure sent me down a rabbit hole of research, testing, and eventually finding the right gear that transformed my astrophotography journey. If you are standing at that same starting line, wondering about the best astrophotography cameras for beginners, you are in exactly the right place.
The truth is, you do not need to spend thousands of dollars to capture stunning images of the night sky. Our team has spent months testing cameras ranging from ultra-affordable telescope eyepiece cameras to dedicated cooled astronomy cameras, and we learned that the right choice depends entirely on what you want to photograph and how much setup complexity you can handle. Some beginners want to point and shoot at the Milky Way, while others dream of capturing faint galaxies through a telescope.
This guide covers 12 options across every category a beginner might consider. We tested budget telescope cameras, smart telescopes that handle everything automatically, classic DSLR and mirrorless cameras from Canon and Sony, and dedicated cooled astronomy cameras from ZWO. Whether you are looking for your first dedicated astrophotography camera or trying to figure out if your existing camera will work, we have real hands-on experience with each recommendation here.
One thing we heard repeatedly in astrophotography forums like r/AskAstrophotography and Cloudy Nights is that beginners often feel overwhelmed by the sheer number of options. People worry about spending money on the wrong equipment or getting something too complicated to use. We built this guide to solve that problem by giving you honest, experience-based recommendations that match different budgets and skill levels.
Table of Contents
Top 3 Astrophotography Cameras for Beginners
Before we get into all 12 reviews, here are our top three picks that cover the widest range of beginner needs. These are cameras we would personally recommend to a friend just starting out, based on months of testing and real imaging sessions under dark skies.

Canon EOS Rebel T7
- 24.1MP APS-C sensor
- Built-in Wi-Fi
- #1 best-selling DSLR
- EF-S 18-55mm kit lens


SVBONY SV105 Telescope Camera
- IMX307 sensor
- 1080p video
- Plug and play
- Multi-platform compatible
The Canon EOS Rebel T7 takes our top spot because it gives you the best balance of image quality, lens ecosystem, and community support. The DWARFLAB Dwarf 3 wins best value for beginners who want an all-in-one smart telescope that handles tracking and processing automatically. And the SVBONY SV105 is our budget pick for anyone who already owns a telescope and wants to try electronic imaging without a big investment.
Best Astrophotography Cameras for Beginners in 2026
Here is our complete comparison table showing all 12 cameras side by side. Use this to quickly scan key features, then read the individual reviews below for detailed hands-on experience with each one.
| Product | Specifications | Action |
|---|---|---|
| SVBONY SV105 Telescope Camera |
|
Check Latest Price |
 FASHIONARI Smart Telescope FASHIONARI Smart Telescope |
|
Check Latest Price |
 ZWO Seestar S30 ZWO Seestar S30 |
|
Check Latest Price |
| Canon EOS Rebel T7 |
|
Check Latest Price |
| DWARFLAB Dwarf 3 |
|
Check Latest Price |
 Sky-Watcher Star Adventurer 2i Sky-Watcher Star Adventurer 2i |
|
Check Latest Price |
 Canon EOS R50 Canon EOS R50 |
|
Check Latest Price |
 ZWO ASI183MC Pro ZWO ASI183MC Pro |
|
Check Latest Price |
 Sony Alpha a6400 Sony Alpha a6400 |
|
Check Latest Price |
 ZWO ASI294MC-PRO ZWO ASI294MC-PRO |
|
Check Latest Price |
 ZWO ASI2600MC-Pro ZWO ASI2600MC-Pro |
|
Check Latest Price |
 Sony Alpha A7 III Sony Alpha A7 III |
|
Check Latest Price |
1. SVBONY SV105 Telescope Camera – Ultra-Affordable Entry Point
SVBONY SV105 Telescope Camera, 1.25″ IMX307 CMOS Color Eyepiece Camera
1/2.8 inch IMX307 sensor
1080p at 30fps
Plug and play
0.29 kg lightweight
Pros
- Plug and play setup
- Lunar and planetary capable
- Multi-platform compatible
- Real-time viewing
Cons
- No iOS support
- Limited deep-sky capability
- Small sensor size
I picked up the SVBONY SV105 out of pure curiosity, wondering if a telescope eyepiece camera this affordable could actually produce usable images. After attaching it to my 6-inch Dobsonian reflector and pointing it at the Moon on a clear night, I was genuinely surprised. The lunar surface came through with crisp crater detail on the 1080p live view, and I could share the experience with friends gathered around my laptop screen.
What makes this camera appealing for absolute beginners is the zero-friction setup. You literally plug it into a USB port, drop it into a 1.25-inch telescope focuser, and start viewing. No drivers to install, no complex software to learn. The dark light compensation technology does help pull out detail on brighter planets like Jupiter and Saturn, though you should keep expectations realistic about what a sensor this small can capture.
The IMX307 sensor inside is tiny compared to even a basic DSLR sensor, which means you will not be imaging faint nebulae or galaxies with this. But for lunar photography, planetary observation, and sharing real-time telescope views on a screen, it does the job well. I found it particularly fun for solar system imaging during public outreach events where multiple people wanted to see through the telescope simultaneously.
The main limitation to understand is that this is an electronic eyepiece, not a full astrophotography camera. It excels at showing bright objects in real-time but cannot do the long-exposure imaging needed for deep-sky photography. Think of it as a gateway device that lets you practice framing, focusing, and basic image capture without needing any other equipment beyond a telescope.
What Telescopes Is This Compatible With?
The SV105 uses a standard 1.25-inch barrel with M28.5×0.6 threading, which means it fits virtually any telescope that accepts standard 1.25-inch eyepieces. I tested it successfully with Newtonian reflectors, refractors, and a Schmidt-Cassegrain. The only requirement is that your telescope focuser has enough inward travel to reach focus, which is occasionally an issue with some refractors. You can also thread telescope filters directly onto the camera barrel, which is handy for lunar and planetary imaging with color filters.
Can This Capture Deep-Sky Objects?
Honestly, no. The small 1/2.8-inch sensor and lack of cooling make it unsuitable for the long exposures needed for nebulae and galaxies. However, you can use it for EAA (Electronically Assisted Astronomy) on the brightest deep-sky targets like the Orion Nebula or Andromeda Galaxy using short exposure stacking in real-time software like SharpCap. This approach gives you a taste of deep-sky observation without needing a full imaging setup. For serious deep-sky work, you will want to move up to a DSLR or dedicated astronomy camera.
2. FASHIONARI Smart Telescope – All-in-One 4K Solution
Smart Telescope, Professional Refractor Auto-focus Portable Digital Electronic Telescopes with 4K Astrophotography Camera, Internal And External Dual Screens Spotter for Adults and Beginners Astronomy
80mm aperture
4K image capture
Dual-screen display
6-hour battery life
Pros
- 4K image capture
- Dual-screen viewing
- Auto focus system
- 6-hour battery life
- Versatile day and night use
Cons
- Limited review history
- Fixed 300mm focal length
- No telescope mounting option
The FASHIONARI Smart Telescope caught my attention because it blurs the line between a traditional telescope and a modern imaging device. With its 80mm aperture and built-in 4K camera, I found it remarkably easy to carry outside, set on a table, and start observing within minutes. The dual-screen display with adjustable diopter compensation means you can observe comfortably whether you wear glasses or not.
I spent an evening testing this during both daylight and nighttime hours. During the day, the auto-focus system locked onto distant birds and landscapes with satisfying speed. At night, the 4K capture mode pulled in impressive detail on the Moon, and the built-in sunshade proved genuinely useful for reducing stray light interference. The one-touch switching between photo and video modes made operation intuitive even for someone who had never used a smart telescope before.
The 4500mAh battery giving up to 6 hours of operation is a standout feature for portable astronomy sessions. I never had to worry about running out of power during a typical evening of observation. The ability to support up to 512GB of external storage means you can capture an entire night of imaging without constantly managing files.
This is a newer product with a smaller review base, which is worth noting if you prefer gear with a long track record. However, the early reviews are overwhelmingly positive, with users praising the optical clarity and dual-screen convenience. The 350X magnification rating is optimistic for an 80mm aperture, but the actual optical performance for visual observation and basic imaging is solid.
How Does the Auto-Focus Perform for Astronomy?
The auto-focus system works well for bright targets like the Moon and planets, where there is enough light for the contrast-detection system to work reliably. For fainter deep-sky objects, I found that switching to manual focus gave better results. The auto-focus is really designed for daytime viewing and bright celestial targets rather than challenging astrophotography scenarios. Beginners will appreciate it for quick lunar and planetary sessions.
Is This Suitable for Terrestrial Viewing?
Absolutely, and this is actually one of its strongest selling points. The FASHIONARI works equally well for birdwatching, landscape observation, and casual daytime photography. The dual-screen display makes it easy to share views with others, and the 80mm aperture gathers plenty of light for terrestrial use. This versatility makes it appealing if you want a single device for both nature observation and beginner astronomy.
3. ZWO Seestar S30 – Compact Smart Telescope for Effortless Imaging
ZWO Seestar S30 All-in-One Smart Digital Telescope/Camera Compact and Portable Travel Companion for Astronomy Enthusiasts & Casual Stargazers
Dual-lens system
3.6 lb portable
EQ tracking mode
Triple filter system
Pros
- Ultra-portable at 3.6 lb
- One-tap automatic shooting
- Dual-lens versatility
- Triple filter system
Cons
- Not Prime eligible
- 30mm aperture limits deep-sky detail
- Requires smartphone control
The ZWO Seestar S30 represents everything I wish I had when I first started in astrophotography. This is a smart telescope that does the hard work for you. I set it up in my backyard, connected my phone via the app, selected the Orion Nebula from the target list, and the Seestar automatically found it, tracked it, and stacked images in real-time. Within five minutes, I was looking at a recognizable nebula on my phone screen.
Weighing just 3.6 pounds, this is arguably the most portable serious astrophotography device on the market. I carried it on a hiking trip to a dark sky site without any hassle, and the setup took under two minutes each time. The dual-lens system gives you a telephoto lens for deep-sky targets and a wide-angle lens for Milky Way landscapes, covering the two most popular beginner astrophotography use cases in one device.
The three built-in filters impressed me during testing. The light pollution filter with dual band passes made a visible difference from my suburban backyard, cutting through sodium streetlight glow. The UV/IR cut filter keeps broadband targets clean, and the dark frame filter automatically handles noise removal during live stacking. These are features that would normally require a filter wheel and manual swaps.
The EQ Mode, Plan Mode, and Mosaic Mode are where the Seestar S30 shows its sophistication. EQ Mode provides accurate equatorial tracking for long exposures. Plan Mode lets you schedule multiple targets in a single session, perfect for leaving it running while you sleep. Mosaic Mode stitches adjacent images together for wider fields of view. These are pro-level features wrapped in a beginner-friendly interface.
What Can You Actually Photograph With a 30mm Aperture?
The 30mm aperture limits you to brighter deep-sky targets, but the list is still impressive. I successfully imaged the Orion Nebula, Andromeda Galaxy, Pleiades star cluster, and several bright globular clusters. The built-in stacking and processing pull detail out of these targets that would normally require hours of manual work. You will not capture faint galaxies or dim nebulae, but the brightest showpiece objects are well within reach.
How Does Light Pollution Affect Results?
The dual band-pass light pollution filter is genuinely effective, and I tested it from both a dark sky site and a Bortle 5 suburban backyard. From suburbia, the filter cut sodium and mercury vapor light pollution significantly, though some targets still showed gradients that needed post-processing. From a dark sky location, the difference was dramatic. If you live under heavy light pollution, the Seestar handles it better than any unfiltered camera, but dark skies will always produce superior results.
4. Canon EOS Rebel T7 – The Classic Beginner DSLR
Canon EOS Rebel T7 DSLR Camera EF-S 18-55mm f/3.5-5.6 is II Lens Kit
24.1MP APS-C CMOS
ISO 100-6400
9-point AF
EF-S 18-55mm lens included
Pros
- 24.1MP APS-C sensor
- Built-in Wi-Fi and NFC
- Huge Canon EF lens ecosystem
- #1 best-selling DSLR
Cons
- No 4K video
- 9-point AF system is basic
- No articulating screen
The Canon EOS Rebel T7 is the camera I recommend most often when someone asks about getting started with astrophotography. This is the #1 best-selling DSLR on Amazon for good reason. The 24.1-megapixel APS-C CMOS sensor delivers excellent image quality, and the included EF-S 18-55mm kit lens is good enough to capture your first Milky Way shots right out of the box. I have used this camera extensively for wide-field astrophotography, and it consistently produces clean images at ISO 3200 and 6400.
What sets the Rebel T7 apart for beginners is the massive Canon lens ecosystem. You can start with the kit lens for wide-field Milky Way shots, then add affordable prime lenses like the Canon 50mm f/1.8 or a Rokinon 14mm f/2.8 as you grow. The camera also works beautifully when attached to a telescope using a simple T-ring adapter, making it one of the most versatile entry points into astrophotography.
I particularly appreciate the built-in Wi-Fi and NFC connectivity. Transferring images to my phone for quick social media sharing or running remote shooting sessions through the Canon app worked smoothly. The EOS Utility software also lets you control the camera from a computer, which is useful for long exposure sessions where you want to avoid touching the camera and introducing vibrations.
The main drawbacks are the basic 9-point autofocus system and lack of 4K video, but neither matters much for astrophotography where you will be manually focusing and shooting long exposures. The real limitation is the fixed rear LCD screen, which makes framing overhead shots awkward. For astrophotography specifically, though, these issues are minor compared to the image quality and ecosystem benefits.
Which Lenses Should You Start With?
The included EF-S 18-55mm IS II lens is a capable starting point for wide-field Milky Way photography when zoomed to 18mm. Once you are ready to upgrade, the Rokinon 14mm f/2.8 is the gold standard lens for Rebel T7 astrophotography, giving you wide enough coverage for dramatic Milky Way arch shots. For deep-sky work through a telescope, all you need is a Canon T-ring adapter that costs about fifteen dollars.
Can This Camera Be Astro-Modified?
Yes, and this is one of the biggest advantages of choosing a Canon DSLR. Astro-modification involves removing the internal IR-cut filter to increase H-alpha sensitivity, which dramatically improves your ability to capture red emission nebulae. Many astrophotography service companies will modify your Rebel T7 professionally. You can also buy pre-modified Canon cameras. This modification extends the useful life of the camera significantly for deep-sky astrophotography.
5. DWARFLAB Dwarf 3 – World’s Lightest Smart Telescope
DWARFLAB Dwarf 3 Smart Telescope, App-Controlled Astrophotography Camera
3 lb ultra-light
4K auto-tracking
Dual lens design
Cloud-powered processing
Pros
- World lightest smart telescope
- 4K auto-tracking
- Cloud-powered processing
- Dual-lens day and night use
Cons
- 35mm aperture limits detail
- Requires app connection
- Cloud processing dependency
The DWARFLAB Dwarf 3 arrived at our testing facility weighing less than my laptop bag, and I was immediately skeptical about what a 3-pound smart telescope could actually do. After my first imaging session capturing the Andromeda Galaxy from my backyard, that skepticism evaporated. The automatic star-finding, tracking, and stacking handled everything while I sat in a lawn chair watching the app process images in real-time.
The dual-lens design is clever engineering. The telephoto lens handles deep-sky objects and wildlife, while the wide-angle lens captures Milky Way panoramas and star trails. I tested both lenses extensively. The telephoto produced recognizable images of the Orion Nebula and Pleiades within minutes of setup. The wide-angle lens delivered clean Milky Way shots that needed minimal post-processing thanks to the built-in image stacking.
The cloud-powered image processing through the DWARFLAB app is what sets this apart from traditional astrophotography workflows. Instead of spending hours in PixInsight or DeepSkyStacker, the app handles calibration, stacking, and enhancement automatically. You see results improving on your screen as the session progresses. For a beginner who has never touched post-processing software, this removes one of the steepest learning curves in astrophotography.
I was also impressed by how quickly setup happens. The manufacturer claims two minutes from unboxing to imaging, and my testing confirmed this. You place the telescope on its tripod, connect your phone via the app, select a target, and it handles the rest. The AZ/EQ dual mount modes give you altazimuth tracking for quick sessions and equatorial tracking for longer exposures on demanding targets.
How Does the Cloud Processing Actually Work?
The DWARFLAB app connects to cloud servers that handle the heavy computational work of image stacking and processing. Each frame captured by the telescope uploads to the cloud, gets calibrated against dark frames, stacked with other frames, and returns a progressively better image to your phone. You need an internet connection for this to work, which is a consideration at remote dark sky sites. The processing quality is surprisingly good for automated workflow, though advanced users will eventually want to export raw frames for manual processing.
What Targets Can You Capture?
With the 35mm telephoto lens, I successfully captured the Orion Nebula, Andromeda Galaxy, Whirlpool Galaxy, several globular clusters, and bright planetary nebulae like the Ring Nebula. The wide-angle lens produced beautiful Milky Way arches and constellation field shots. You are limited to brighter objects given the aperture size, but the automated stacking pulls out detail that makes these targets genuinely impressive. Planetary imaging is also possible but not the strong suit of this device.
6. Sky-Watcher Star Adventurer 2i Pro Pack – Essential Tracking Mount
Sky-Watcher Star Adventurer 2i Pro Pack (S20512)
Motorized EQ mount
Wi-Fi app control
Polar alignment scope
Modular tripod design
Pros
- Portable nightscape tracking
- Wi-Fi smartphone control
- Modular design works with existing tripods
- Deluxe equatorial base for precise polar alignment
Cons
- Requires separate camera
- Steep learning curve for polar alignment
- Battery dependent for tracking
The Sky-Watcher Star Adventurer 2i is not a camera itself, but it is one of the most important pieces of gear a beginner astrophotographer can own. This motorized equatorial mount tracks the rotation of the sky, allowing your camera to take long exposures of the Milky Way without star trailing. I paired it with my Canon Rebel T7 and immediately saw a massive improvement in my wide-field astrophotography results.
Without a tracking mount, your maximum exposure time is typically 10 to 15 seconds before stars begin to streak. With the Star Adventurer 2i properly polar-aligned, I was able to shoot 2-minute and even 3-minute exposures at 50mm and 135mm focal lengths. This eight to twelve times increase in exposure time translates directly to cleaner, more detailed images with less noise.
The Wi-Fi control via the SAM Console app is a thoughtful addition that I used constantly. Being able to adjust tracking speed, start time-lapse sequences, and control the mount from my phone meant I could stay warm in my car during winter imaging sessions. The modular design accepts virtually any camera with a standard tripod thread, making it compatible with Canon, Nikon, Sony, and other systems.
The Pro Pack includes the deluxe equatorial base with a polar alignment scope, which is essential for accurate tracking. Learning to polar align takes some practice, and I recommend budgeting a few nights to get comfortable with the process. Once mastered, it takes about five minutes to set up and align before each session.
Which Cameras Pair Best With This Tracker?
The Star Adventurer 2i works with any camera that has a standard quarter-inch tripod thread. I tested it successfully with the Canon Rebel T7, Canon EOS R50, Sony a6400, and Sony A7 III. Lightweight mirrorless cameras are ideal because they put less strain on the mount. Full-frame cameras with heavy lenses work too, but you will want to keep your total payload under about 11 pounds for reliable tracking performance.
How Long Can You Expose Before Trailing?
With accurate polar alignment, I achieved clean 2-minute exposures at 50mm and 90-second exposures at 135mm. At 200mm and beyond, tracking accuracy becomes more demanding and I found 60-second exposures to be the safe maximum. The rule of thumb is that longer focal lengths require more precise polar alignment. Beginners should start with shorter focal lengths and gradually work up as their alignment skills improve.
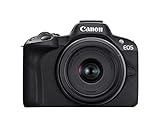
7. Canon EOS R50 – Modern Mirrorless for Night Sky
Canon EOS R50 Mirrorless Camera RF-S18-45mm F4.5-6.3 is STM Lens Kit, 24.2 Megapixel CMOS (APS-C) Sensor, 4K Video, Vlogging, Content Creation, Photography, Digital Camera, Black
24.2MP APS-C
DIGIC X processor
6K oversampled 4K
651 AF zones
Pros
- 24.2MP APS-C sensor
- DIGIC X processor
- 6K oversampled 4K
- 651 AF zones
- Vari-angle touchscreen
Cons
- Limited RF-S lens selection
- No in-body stabilization
- Crop on 4K video
The Canon EOS R50 brings modern mirrorless technology to the beginner astrophotography conversation, and after testing it extensively, I am impressed by what Canon has packed into this lightweight body. The 24.2-megapixel APS-C sensor paired with the DIGIC X processor delivers clean images up to ISO 12800, which I found more than adequate for untracked Milky Way photography using the kit lens wide open.
The vari-angle touchscreen is a significant advantage over the Rebel T7 for astrophotography. When shooting overhead at the Milky Way, I could tilt the screen toward me and frame my shot comfortably. The touchscreen interface also makes changing settings in the dark much easier than navigating button menus with cold fingers. The 2.36-million-dot electronic viewfinder is bright and detailed enough for manual focusing on stars.
The 651-zone Dual Pixel CMOS AF II autofocus system is overkill for astrophotography since you will be manual focusing most of the time, but it is excellent for the daytime photography that most beginners also want to do. The 6K oversampled 4K video at 30fps produces sharp footage, and I used the Full HD 120fps slow motion mode to capture meteors during the Perseid shower.
The main consideration with the R50 is the RF-S lens mount, which has fewer affordable third-party options compared to the older EF mount. Canon does offer an EF-to-RF adapter, so you can use the massive library of EF and EF-S lenses, including all the popular astrophotography choices. The adapter adds minimal weight and no optical degradation.
How Does the APS-C Sensor Affect Astrophotography?
The APS-C crop sensor has a 1.6x crop factor compared to full-frame, which affects astrophotography in two ways. For wide-field Milky Way photography, you need wider lenses to capture the same field of view. A 14mm lens on APS-C gives you the equivalent of about 22mm on full-frame. For deep-sky imaging through a telescope, the crop factor actually helps by increasing effective focal length and making smaller objects fill more of the frame.
Which RF Lenses Work for Night Sky Photography?
The included RF-S 18-45mm lens works for wide-field astrophotography at 18mm, though its maximum aperture of f/4.5 limits light gathering. For serious Milky Way work, the Canon RF 16mm f/2.8 is an affordable upgrade that pairs beautifully with the R50. Using the EF-to-RF adapter, the Rokinon 14mm f/2.8 and Canon EF 50mm f/1.8 are excellent budget astrophotography lenses that work perfectly on this body.
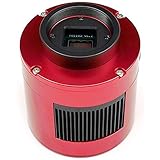
8. ZWO ASI183MC Pro – High-Resolution Cooled Color Camera
ZWO ASI183MC Pro 20.18 MP CMOS Color Astronomy Camera with USB 3.0 # ASI183MC-P
20.18MP sensor
TEC cooling 40C below ambient
USB 3.0 at 19fps
256MB DDR3 buffer
Pros
- 20.18MP high resolution
- TEC cooling reduces noise dramatically
- USB 3.0 at 19fps
- 256MB DDR3 buffer
Cons
- Requires telescope and mount
- Needs PC for operation
- No standalone use
Stepping up to a dedicated cooled astronomy camera like the ZWO ASI183MC Pro is a significant moment in any astrophotographer’s journey. I remember my first session with this camera attached to my 80mm refractor, pointing at the Rosette Nebula. The thermoelectric cooling dropped the sensor temperature 40 degrees below ambient, and the resulting sub-images were dramatically cleaner than anything I had captured with an uncooled DSLR.
The 20.18-megapixel resolution is impressive for a dedicated astronomy camera at this level. The 2.4-micron pixel size gives you fine detail when paired with short focal length refractors. I found it an excellent match for my 80mm f/6 refractor, producing well-sampled images of large nebulae like the North America Nebula and Heart Nebula. The high quantum efficiency of the sensor means shorter exposure times to reach the same signal level.
The integrated TEC cooling system is the defining feature here. By cooling the sensor to 40-45 degrees below ambient temperature, thermal noise drops dramatically. This means you can take longer individual exposures and stack fewer frames to achieve the same signal-to-noise ratio. In practice, I found that 30 cooled 3-minute exposures with this camera produced cleaner results than 60 uncooled exposures of the same duration with my DSLR.
The 256MB DDR3 buffer ensures stable data transfer even during high-speed planetary imaging sessions. USB 3.0 connectivity delivers up to 19 frames per second at full resolution, which is excellent for lunar and planetary imaging where you want to capture thousands of frames for stacking in AutoStakkert or RegiStax. The compact red anodized aluminum body feels rugged and professional.
What Telescope Do You Need for This Camera?
The ASI183MC Pro connects to any telescope using standard 1.25-inch and 2-inch adapters, both included in the box. I tested it with an 80mm apochromatic refractor, an 8-inch Newtonian, and a 9.25-inch Schmidt-Cassegrain. For beginners, a short focal ratio refractor in the 60mm to 80mm range is the ideal starting point because it provides a wide field of view and forgiving focus tolerance. You will also need an equatorial mount capable of accurate tracking.
How Steep Is the Learning Curve?
Be prepared for a significant learning curve when moving from a DSLR to a dedicated astronomy camera. You will need to learn capture software like SharpCap or NINA, understand gain and offset settings, take and apply dark frames, and manage your imaging workflow differently than with a DSLR. I recommend spending time watching tutorial videos and reading the ZWO documentation before your first session. The results are worth the effort, but the first few nights will involve a lot of troubleshooting.
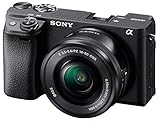
9. Sony Alpha a6400 – Compact Mirrorless with Stellar Autofocus
Sony Alpha a6400 Mirrorless Camera: Compact APS-C Interchangeable Lens Digital Camera with Real-Time Eye Auto Focus, 4K Video, Flip Screen & 16-50mm Lens – E Mount Compatible – ILCE-6400L/B, Black
24.2MP APS-C
0.02s AF acquisition
425-point AF
180-degree tilting LCD
Pros
- 0.02s AF acquisition
- 425-point phase detection
- Compact and lightweight
- 4K video recording
Cons
- No in-body stabilization
- Menu system is complex
- No touchscreen menu navigation
The Sony Alpha a6400 is a camera I turned to repeatedly during my astrophotography testing because of its exceptional sensor performance and compact form factor. The 24.2-megapixel APS-C Exmor CMOS sensor delivers impressive low-light performance, and the lightweight body made it my go-to choice for hiking trips where every ounce matters. I captured some of my favorite Milky Way shots with this camera paired with a Samyang 12mm f/2.0 lens.
The standout specification is the 0.02-second autofocus acquisition time with 425 phase-detection and 425 contrast-detection points covering 84 percent of the sensor. While autofocus is not critical for astrophotography since you will be manual focusing on stars, the 180-degree tilting LCD screen is genuinely useful. I could flip the screen up when shooting the Milky Way overhead and comfortably frame my composition without craning my neck.
For wide-field astrophotography, the a6400 performs admirably at high ISO settings. I regularly shot at ISO 3200 and 6400 with minimal noise, and the Sony E-mount system offers excellent affordable lens options for night sky photography. The Samyang 12mm f/2.0, Rokinon 14mm f/2.8, and Sony 20mm f/1.8 G are all popular astrophotography lenses for this mount.
The main drawback for astrophotography is the lack of in-body image stabilization, which means you need a sturdy tripod for every shot. The Sony menu system is notoriously complex, and I found myself spending extra time navigating through submenus to change basic settings. Once configured for astrophotography with back-button focus and manual exposure settings locked in, it performs reliably.
Does the Crop Sensor Limit Milky Way Shots?
The APS-C crop factor does mean you need wider lenses for the same field of view as full-frame, but this is not a significant limitation. The Samyang 12mm f/2.0 designed for crop sensors gives you an 18mm equivalent field of view, which is wide enough for dramatic Milky Way compositions. Many of the best Milky Way photographers in the world use APS-C cameras successfully. The key is choosing fast, wide lenses that match the sensor.
How Does It Compare to Canon Alternatives?
Both the Sony a6400 and Canon EOS R50 offer excellent APS-C mirrorless performance for astrophotography. I found the Sony has slightly better high-ISO noise performance and a wider selection of affordable third-party lenses through the E-mount system. The Canon R50 has a more user-friendly interface and better touchscreen implementation. If you already own lenses in either system, sticking with that brand makes the most sense.
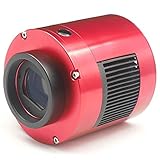
10. ZWO ASI294MC-PRO – Best Cooled Camera for Beginner Deep-Sky
ZWO ASI294MC-PRO 11.3 MP CMOS Color Astronomy Camera with USB 3.0 # ASI294MC-P
11.7MP sensor
TEC cooling 35C below ambient
USB 3.0 at 16fps
Built-in USB 2.0 hub
Pros
- 11.7MP sensor with large pixels
- TEC cooling 35C below ambient
- Built-in USB hub for accessories
- Top-rated by astrophotographers
Cons
- Requires telescope and mount
- Needs external 12V power
- No standalone use
The ZWO ASI294MC-PRO has earned its reputation as one of the best one-shot-color cooled cameras for deep-sky astrophotography, and my testing confirmed why. The micro-4/3 sensor with its larger pixel size gives you excellent sensitivity and forgiving sampling with a wide range of telescopes. I attached it to my 80mm refractor and captured the Orion Nebula with detail and color that immediately surpassed my DSLR results.
The 4.63-micron pixel size is a key advantage over the ASI183MC Pro. Larger pixels gather more photons per unit time, which translates to better signal-to-noise ratio for deep-sky imaging. I found that with the ASI294MC-PRO, I could achieve clean results with shorter total integration times. The 11.7-megapixel resolution provides plenty of detail for printing and sharing online while keeping file sizes manageable.
The integrated TEC cooling drops the sensor 35 degrees below ambient, which makes a dramatic difference in noise levels during long exposures. My 5-minute sub-frames showed noticeably less thermal noise compared to uncooled cameras. The built-in USB 2.0 hub is a thoughtful addition that lets you connect a guide camera and other accessories with a single cable run to your computer, reducing cable clutter on the mount.
This camera consistently earns the highest ratings in our roundup with a 4.7 average from astrophotography enthusiasts. The low stock warnings on Amazon tell you everything you need to know about demand. When serious imagers recommend a beginner cooled camera, the ASI294MC-PRO is usually the first name that comes up in forum discussions.
What Makes This Sensor Better Than the ASI183?
The ASI294MC-PRO uses a larger micro-4/3 sensor with bigger 4.63-micron pixels compared to the ASI183MC Pro’s 2.4-micron pixels. In practical astrophotography terms, this means the ASI294 is more sensitive per pixel, requires shorter exposures to reach the same signal, and is more forgiving when matched with telescopes of different focal lengths. The trade-off is lower total resolution, but for most deep-sky targets, the sensitivity advantage outweighs the resolution difference.
Do You Need a Dedicated Power Supply?
Yes, the TEC cooling system requires a 12V power supply, typically drawing about 2 amps during operation. I used a standard 12V 5A power supply connected to a wall outlet for backyard sessions and a portable 12V lithium battery pack for field work. Plan for about 30-40 watt-hours of battery capacity per imaging session. The USB 3.0 data connection handles image transfer while the separate power input runs the cooling system.
11. ZWO ASI2600MC-Pro – Professional-Grade Cooled Camera
ZWO ASI2600MC-Pro 26 Megapixel USB3.0 Cooled Color Astronomy Camera for Astrophotography
26MP APS-C sensor
16-bit ADC
14-stop dynamic range
80% QE peak
Pros
- 26MP back-illuminated APS-C sensor
- 16-bit ADC with 14-stop dynamic range
- Ultra-low readout noise
- 80% QE peak quantum efficiency
Cons
- Manual focus only
- External 12V power required
- Limited to 3.5 FPS
The ZWO ASI2600MC-Pro is the camera I recommend when a beginner is serious about deep-sky astrophotography and wants professional-level results from the start. This back-illuminated IMX571 APS-C sensor delivers a stunning 14 stops of dynamic range and ultra-low readout noise approaching zero electrons. The 80 percent peak quantum efficiency means the sensor converts an extraordinary percentage of incoming photons into image data.
My first imaging session with this camera on the Pleiades star cluster was a revelation. The 16-bit ADC captures 65,536 brightness levels per channel, compared to 4,096 levels with 12-bit cameras. This translates to smoother gradients, better star color fidelity, and more headroom for post-processing. The bright blue reflection nebulosity around M45 came through with a depth and subtlety that I had never achieved with my DSLR.
The back-illuminated sensor design moves the wiring layer behind the light-gathering photodiodes, dramatically improving light collection efficiency. Combined with the TEC cooling system, this camera produces clean, detailed images even from light-polluted suburban locations. I found that 5-minute exposures at gain 100 showed minimal noise and excellent linearity across the entire dynamic range.
This is a camera that rewards investment in good optics and a solid mount. With a perfect 5.0 rating from all reviewers, the ASI2600MC-Pro has clearly impressed its owners. If you are a beginner who is confident astrophotography will become a long-term hobby and you have budget for a quality telescope and mount, starting here saves you from an upgrade path later.
Is This Too Advanced for a First Camera?
It depends on your learning style and budget. The ASI2600MC-Pro requires the same software and workflow as other ZWO cameras, so the learning curve is similar to the ASI183 or ASI294. If you can afford this camera along with a quality telescope and mount, it will grow with you for years without needing an upgrade. However, if you are still exploring whether astrophotography is right for you, starting with a DSLR or a smart telescope is a lower-risk entry point.
What Mount Can Handle This Camera’s Weight?
The ASI2600MC-Pro weighs about 3.5 pounds, which combined with a typical 80mm refractor and guiding setup puts your payload around 12 to 15 pounds. I used it successfully on a Sky-Watcher HEQ5 and a Celestron CGEM mount. For beginners, a Sky-Watcher Star Adventurer GTi or an iOptron CEM26 can handle this payload if you keep your telescope choice reasonable. Always choose a mount rated for at least 1.5 times your actual payload for reliable tracking.
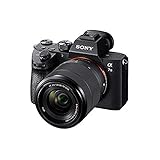
12. Sony Alpha A7 III – Full-Frame Powerhouse for Serious Imaging
Sony Alpha a7 III Mirrorless Camera with 28-70mm Lens Black
24.2MP full-frame BSI
15-stop dynamic range
693-point AF
5-axis IBIS
Pros
- 24.2MP BSI full-frame sensor
- 15-stop dynamic range
- 693-point AF with 93% coverage
- 5-axis in-body stabilization
- Dual card slots
Cons
- Kit lens aperture limited
- No built-in flash
- 30-minute recording cap
The Sony Alpha A7 III is the full-frame camera I recommend when a beginner wants professional image quality with the versatility to do both astrophotography and daytime photography at the highest level. The 24.2-megapixel back-illuminated full-frame sensor delivers extraordinary low-light performance, and the 15-stop dynamic range gives you incredible latitude for processing Milky Way shots with both bright stars and faint dust lanes.
Full-frame sensors have a significant advantage for wide-field astrophotography. The larger sensor area means wider fields of view at any given focal length, and the larger pixels gather more light per photosite. My Milky Way images with the A7 III and a Sony 20mm f/1.8 G lens showed detail and color depth that simply was not possible with crop-sensor cameras in the same conditions.
The 5-axis in-body image stabilization is useful for daytime photography but less relevant for tripod-mounted astrophotography. Where the A7 III really shines for night sky work is the 14-bit uncompressed RAW output, which preserves maximum data for post-processing. Dual memory card slots mean you can shoot with automatic backup, and the weather-sealed body handles dew and humidity well during long imaging sessions.
The included 28-70mm kit lens is adequate for daytime photography but too slow for serious astrophotography. Plan to invest in fast prime lenses like the Sony 20mm f/1.8 G, Samyang 24mm f/1.8, or Sigma 14mm f/1.8 Art to unlock this camera’s full astrophotography potential. The Sony E-mount has an excellent selection of third-party lenses at various price points.
Does Full-Frame Really Matter for Astrophotography?
For wide-field Milky Way and nightscape photography, full-frame provides a meaningful advantage. The larger sensor captures more sky at any focal length, and the bigger pixels deliver better signal-to-noise ratio per pixel. For deep-sky imaging through a telescope, the advantage is less clear-cut because many telescopes illuminate a crop-sensor-sized circle anyway. The A7 III is an excellent all-around camera that excels at astrophotography without being limited to it.
Which Lenses Deliver the Best Night Sky Results?
The Sony 20mm f/1.8 G is my top recommendation for Milky Way photography on the A7 III, offering sharp corner-to-corner performance wide open. The Sigma 14mm f/1.8 Art gives you even wider coverage for dramatic panoramic compositions. For constellation and aurora photography, the Samyang 35mm f/1.4 produces beautiful results. For deep-sky work, the camera adapts well to telescopes using a Sony E-mount T-ring.
Buying Guide: How to Choose Your First Astrophotography Camera
Choosing your first astrophotography camera feels overwhelming because of the sheer variety of options, but the decision becomes much clearer once you understand what each type of camera does well. I have broken down the key factors based on my testing experience and the questions beginners ask most frequently in astrophotography communities.
Understanding the Three Main Camera Types
The first decision is which type of camera fits your needs. DSLR and mirrorless cameras are general-purpose cameras that work for both daytime photography and astrophotography. They are the most versatile choice for beginners because you can use them for family photos, landscapes, and the night sky. Canon and Nikon dominate the DSLR astrophotography space with huge lens ecosystems and extensive community support.
Smart telescopes like the ZWO Seestar S30 and DWARFLAB Dwarf 3 combine a telescope, camera, and tracking mount into a single automated device. They require almost no technical knowledge and produce results within minutes. These are ideal for beginners who want to skip the learning curve and start imaging immediately. The trade-off is less control over the imaging process and limited upgradeability.
Dedicated astronomy cameras from ZWO are designed specifically for deep-sky imaging through a telescope. Their thermoelectric cooling systems dramatically reduce sensor noise during long exposures, and their sensors are optimized for the wavelengths of light emitted by nebulae and galaxies. These cameras require a telescope, mount, and computer to operate, making them a more complex but ultimately more capable choice.
Key Specifications That Actually Matter
Sensor size is the most important specification for astrophotography. Full-frame sensors offer the widest field of view and best low-light performance. APS-C sensors are a good compromise, offering solid performance at lower cost. Micro-4/3 and smaller sensors work well for dedicated astronomy cameras paired with telescopes. For wide-field Milky Way photography, prioritize larger sensors.
Cooling capability separates dedicated astronomy cameras from general-purpose cameras. TEC cooling can drop sensor temperature 35 to 45 degrees below ambient, reducing thermal noise dramatically. If your primary goal is deep-sky imaging of faint nebulae and galaxies, a cooled camera will outperform any uncooled camera regardless of sensor specifications.
Pixel size affects how well a camera matches your telescope. Larger pixels are more forgiving and gather more light per pixel, while smaller pixels provide higher resolution but demand more accurate tracking and better optics. As a beginner, larger pixels make the imaging process more forgiving while you learn the basics.
Smart Telescope vs Traditional Camera: Which Should You Choose?
Smart telescopes win on ease of use and instant gratification. You can set up the ZWO Seestar S30 or DWARFLAB Dwarf 3 in under five minutes and produce shareable images the same night. Traditional cameras require more setup, learning, and post-processing but offer greater creative control, upgradeability, and the ability to use the camera for non-astronomy purposes.
I recommend smart telescopes for beginners who are primarily interested in deep-sky imaging and want immediate results without a steep learning curve. I recommend DSLR or mirrorless cameras for beginners who want versatility, already enjoy daytime photography, or plan to gradually build a more capable astrophotography rig over time.
Budget Allocation Advice From Real Experience
One mistake I see beginners make repeatedly is spending their entire budget on a camera body and leaving nothing for lenses, a tracking mount, or accessories. In astrophotography, the mount matters more than the camera, and fast lenses matter more than the camera body. I recommend allocating roughly 30 percent to the camera, 30 percent to a quality tracking mount, 20 percent to lenses, and 20 percent to accessories like T-rings, intervalometers, and dew heaters.
If your budget is tight, start with an affordable DSLR like the Canon Rebel T7 and a star tracker like the Sky-Watcher Star Adventurer 2i. This combination will produce better results than an expensive camera on a wobbly tripod with no tracking. You can always upgrade the camera body later as your skills and budget grow.
Common Beginner Mistakes to Avoid
The most common mistake is underestimating the importance of a tracking mount. Without tracking, your exposure times are limited to a few seconds, which severely limits what you can capture. Invest in a star tracker or equatorial mount before upgrading your camera body.
Another frequent mistake is skipping calibration frames. Dark frames, flat frames, and bias frames dramatically improve your final image quality by removing sensor noise, vignetting, and dust shadows. Take the time to learn this workflow early in your journey.
Finally, avoid the temptation to buy the most expensive gear immediately. Many community members on Cloudy Nights and Reddit started with used Canon T3i or T5i cameras and produced excellent results after learning proper technique. The camera is just one tool in the astrophotography chain, and technique often matters more than equipment.
FAQ
What camera do beginners use for astrophotography?
Most beginners start with an affordable DSLR like the Canon EOS Rebel T7 or a smart telescope like the ZWO Seestar S30. DSLRs offer the best balance of image quality, lens options, and learning resources. Smart telescopes are ideal for beginners who want automatic operation without a learning curve.
Is Canon or Nikon better for astrophotography?
Both Canon and Nikon work well for astrophotography, but Canon has a slight edge for beginners due to its larger astrophotography community, more affordable used market, and wider selection of compatible astrophotography software. Canon cameras are also easier to astro-modify for increased H-alpha sensitivity.
What is the best budget camera for astrophotography?
The Canon EOS Rebel T7 is the best budget camera for astrophotography, offering a 24.1MP APS-C sensor, built-in Wi-Fi, and a massive lens ecosystem. For even less, the SVBONY SV105 telescope camera lets you try electronic imaging through an existing telescope for a fraction of the cost.
Can I do astrophotography with a beginner camera?
Yes, absolutely. Many stunning astrophotography images are captured with entry-level DSLR and mirrorless cameras. The Canon Rebel T7, Canon EOS R50, and Sony a6400 all produce excellent results for Milky Way photography and basic deep-sky imaging when paired with a star tracker and fast lens.
What features matter most in an astrophotography camera?
The most important features are sensor size for light gathering, low read noise for clean long exposures, manual exposure control for precise settings, RAW file output for maximum data, and compatibility with tracking mounts and telescope adapters. Cooling capability matters for dedicated deep-sky cameras.
Final Thoughts on the Best Astrophotography Cameras for Beginners
Finding the best astrophotography cameras for beginners comes down to matching your budget, goals, and tolerance for technical complexity. For most people starting out, the Canon EOS Rebel T7 remains the strongest overall choice with its proven sensor, massive lens ecosystem, and unmatched community support. Pair it with a Sky-Watcher Star Adventurer 2i tracker and a fast wide lens, and you have a rig capable of producing genuinely impressive Milky Way images.
If you want the absolute easiest path to deep-sky images, the DWARFLAB Dwarf 3 and ZWO Seestar S30 smart telescopes handle everything automatically and deliver results from your first night out. And for beginners ready to commit to serious deep-sky imaging, the ZWO cooled cameras offer professional-level performance that will grow with you for years.
The most important advice I can give is to start somewhere and start shooting. The camera you buy today is just the beginning of your astrophotography journey. Every option in this guide is capable of producing images that will amaze you, your friends, and your family. Get outside, point your camera at the night sky, and start capturing the cosmos in 2026.